Sunday 9 September 2012

Pinhole camera

In wanting to have a go at some film photography I also fancied the idea of making my own camera. Obviously it would be difficult to use proper optics, so the sensible option is a pinhole camera. I had a medium format film sent down by my parents, which I wanted to use, but it was getting tricky trying to work out how to get it all to work, and wind on especially. So I had a go at making a matchbox pinhole camera instead. There are good instructions at http://www.matchboxpinhole.com/ and there are plenty of photos and other variations on this design available at http://www.flickr.com.

20120830-DSC_8252 An old film canister to wind the film into, a matchbox with a pinhole made in an aluminium drinks can, and the full new film. Ilford 100asa black and white.

I didn’t take very many photos whilst making my pinhole camera, but thought I better have a couple to put on here. I won’t go through the instructions, but basically you make a pinhole very carefully in a bit of aluminium drinks can (mine is 0.15mm diameter), and put that in the side of a matchbox. Then you thread through a new film and sellotape it to the end of a used up film. Lots of black electrical tape makes it lightproof and a makeshift card shutter is all you need to expose the film.
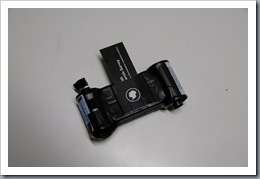
20120830-DSC_8254 I cut a piece out of a BAS calendar to use as the shutter.

Apart from remembering to wind on it’s really easy to use, and you just count for a couple of seconds in sunlight, about 5 seconds in cloud, and several minutes indoors. The frames are 24mm square, so it’ll take a while to finish the film, but it will be interesting to see the results, especially the occasional double exposure!
Sunday 2 September 2012

Film photography

A visitor to South Georgia kindly left an old Nikon film SLR, and some black and white films to go with the darkroom equipment we have on base. There is a darkroom for developing x-ray film for the doctor, and historically darkroom equipment has been held on bases for processing photographic film for work and recreation. With the popularity of digital though it hasn’t seen much use over the last few years, so I decided to have a play.

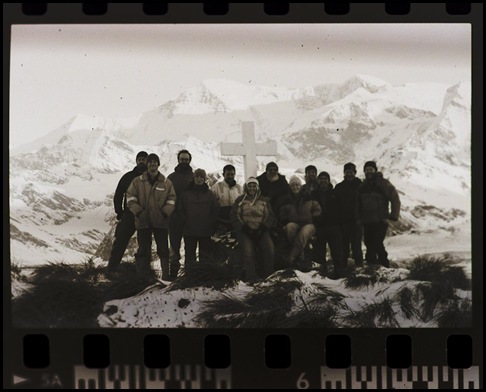
Traditionally on each base a midwinter photo is taken, framed and placed on the wall each year with all the other midwinter photos. This year I thought it would be nice to have a photo taken, developed, and printed on base, using good old film and paper.

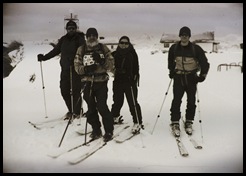
20120827-DSC_8244 Going out for a ski

Both the film camera and my digital were set up to take the midwinter photo, and after setting the timer I just had to run round to the group, easier said than done in the snow and tussac. That done, I then had to finish the film off, it felt quite odd having to wait to get the photo, and even stranger getting used to not being able to check the photo on the back of the camera.

20120827-DSC_8247 Gentoo penguins on the track

Several more weeks passed while I read up on developing films, found the appropriate chemicals on base, and then got around to processing the film. Loading it into it’s reel was quite a fiddle in the complete darkness, and it took three attempts to get it in right. After that it was plain sailing using a JOBO canister and water bath. Set the timer, pour in the developer, wait 15mins, pour it out, pour in the stop, 30 sec, pour it out, pour in the fixer, wait, pour it out, then rinse several times. It was quite exciting when I unloaded the canister to see a developed film, quite a relief to be honest to see the images there recorded. A long swipe with a squeegee, and hang up to dry (diagonally).

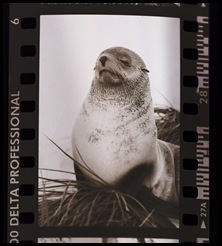
20120827-DSC_8248 Posing fur seal

I really wanted to see what the photos were like, so I got my digital SLR and macro lens and headed back to the darkroom. With the film hung up, and trying to avoid reflections I took a few backlit photos of some of the frames. I was then able to invert these in Lightroom by reversing the levels curve, and then playing with the brightness and contrast to get a pleasing result.

20120827-DSC_8249 Midwinter group photo at Shackletons cross, with Mt. Paget in the background.

Now I have to get into the darkroom again, and have a play with printing the negatives. They have a wide tonal range, the very bright mountains/snow, and the dark foreground, so it should be and interesting job. Lets hope I manage OK!